Make videos like this:
One of the biggest features missing from the D90 for many photographers is the Intervalometer. External ones are available but for those of you, like me, who are simply wanting to experiment with this awesome technique, their is a way round forking out your hard earned cash.
The majority of this description will be for mac, but their are plenty of third-party apps available for windows. A quick Google search should reveal all!
The method i shall be describing involves no downloads or external pieces of hardware for image capture. All you need is a mac, a D90 (or just about any camera) and a USB cord.
For compilation and output you’ll need Quicktime Pro (Do a quick YouTube search for quicktime pro free, who knows what results you’ll get ;))
Step 1:
Search Spotlight for Image Capture. An icon like this one should come up:

Launch Image Capture.
Step 2:
Set your cameras quality to jpeg fine/superfine, NOT RAW, it’ll take an age to process. Plug your camera in and be sure to make sure its set to ptp, NOT mass storage (This is done for you on the D90) and turn it on. You might have to wait for a minute, depending on your computer speed
Next select File>Take Picture
Now, heres the clever feature you never knew about. Simply enter how often you want an image to be captured.
(OPTIONAL)
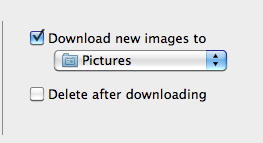
Select Download New Images To… and make a new folder named appropriately for your project. This will save you time downloading.
Leave your camera and laptop to do their thing (stay close if you’d prefer to keep them)
Stage 2:
Now comes the easy bit. I know, this is surprisingly easy isn’t it?
Quicktime pro:
Launch Quicktime Pro and go to File>Open Image Sequence
open the file containing the images and select the first image.
Select which frame rate you would like to use, I like to use a fairly slow frame rate, around 12fps then speed it up in FCP.
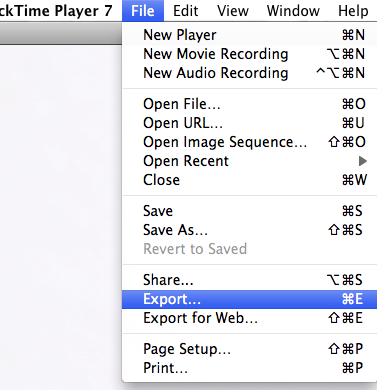
Go to File>export
Choose Movie to QuickTime Movie
Click Options
Click settings
If you have access to Final Cut Pro, i reccommend Apple ProRes 422, if not H.264 is a good all rounder.
Click Size…
I reccommend 1920×1080, but use whatever your devices support
As digital camera images are captured in a different aspect ratio to professional filming, use the Letterbox Preserve Aspect Ratio setting.
Edit colours, speed, masking, audio, etc in a FCP type of editing suite. and export to disc, YouTube, whatever!
Post me a response of the vid you make if this has helped.


Brilliant! Thanks for sharing your technique. I’ve always wanted to try out time lapse photography.
Cheers,
Randy
I don’t have a D90 (yet!) but I’ve book-marked this for reference once I’ve gotten mine. Thanks for sharing!
Hey, Thanks for blogging about this. Does the D90 come with the USB cord you mentioned? Thanks
I do believe it does. If not you probably already have one, its a generic USB A-B, same as a PSP and Blackberry’s.
Thanks a lot! amazing technique!
Unfortunately i’ve only got a pc.. but it;ll deffinitely be useful for future ref.
Many thanks!
Pingback: Time Lapse Test – Fernando Gros
This made my day. I was looking to find the simplest way to record an hour in our busy household of 4 adults and 3 kids different shapes and sizes and it worked brilliantly. So simple, I only had to get quicktime pro, thanks for that tip too :))).
The test worked so well, can’t wait to do more.
Thank you so much for sharing, I feel like I’ve been given a present :)!
Take care
Ana
Thanks for the post Ollie; really really helpful! I have done some time lapses recently, but it was calling in favours from my Dad or friends who own D2X’s with built in intervalometers, but this is great as I have a D90.
Great post! Thanks.
Chris
http://www.chrislovelock.info